Fast DDS Discovery Server
This page gives instructions on how to use a Fast DDS discovery server with the Create® 3 robot as a client. For more information on the Fast DDS discovery server, please refer to the eProsima documentation.
We’ll use the term "computer" to refer to any SBC (single board computer), virtual machine, personal computer, etc.
Configure Server
-
Start the discovery server on the computer that you wish to use as your server by replacing
with the computer's IP address. fastdds discovery -i 0 -l <SERVER_IP> -p 11811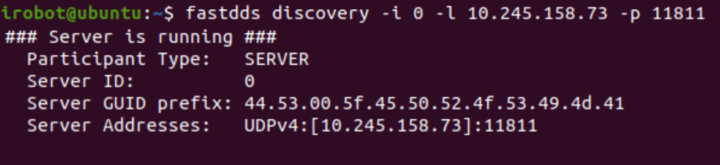
Configure Create® 3 Robot as a Client
Important
If you have enabled the discovery server previously and wish to change the Wi-Fi network you are connected to, make sure the discovery server is disabled in the configuration settings before connecting it to a new Wi-Fi network. The discovery server can be disabled by unchecking the "Enable Fast DDS discovery server?" checkbox in the webserver application settings, and then saving and restarting the application.
-
Make sure your Create® 3 robot is connected to Wi-Fi. If it isn't, follow the directions here.
-
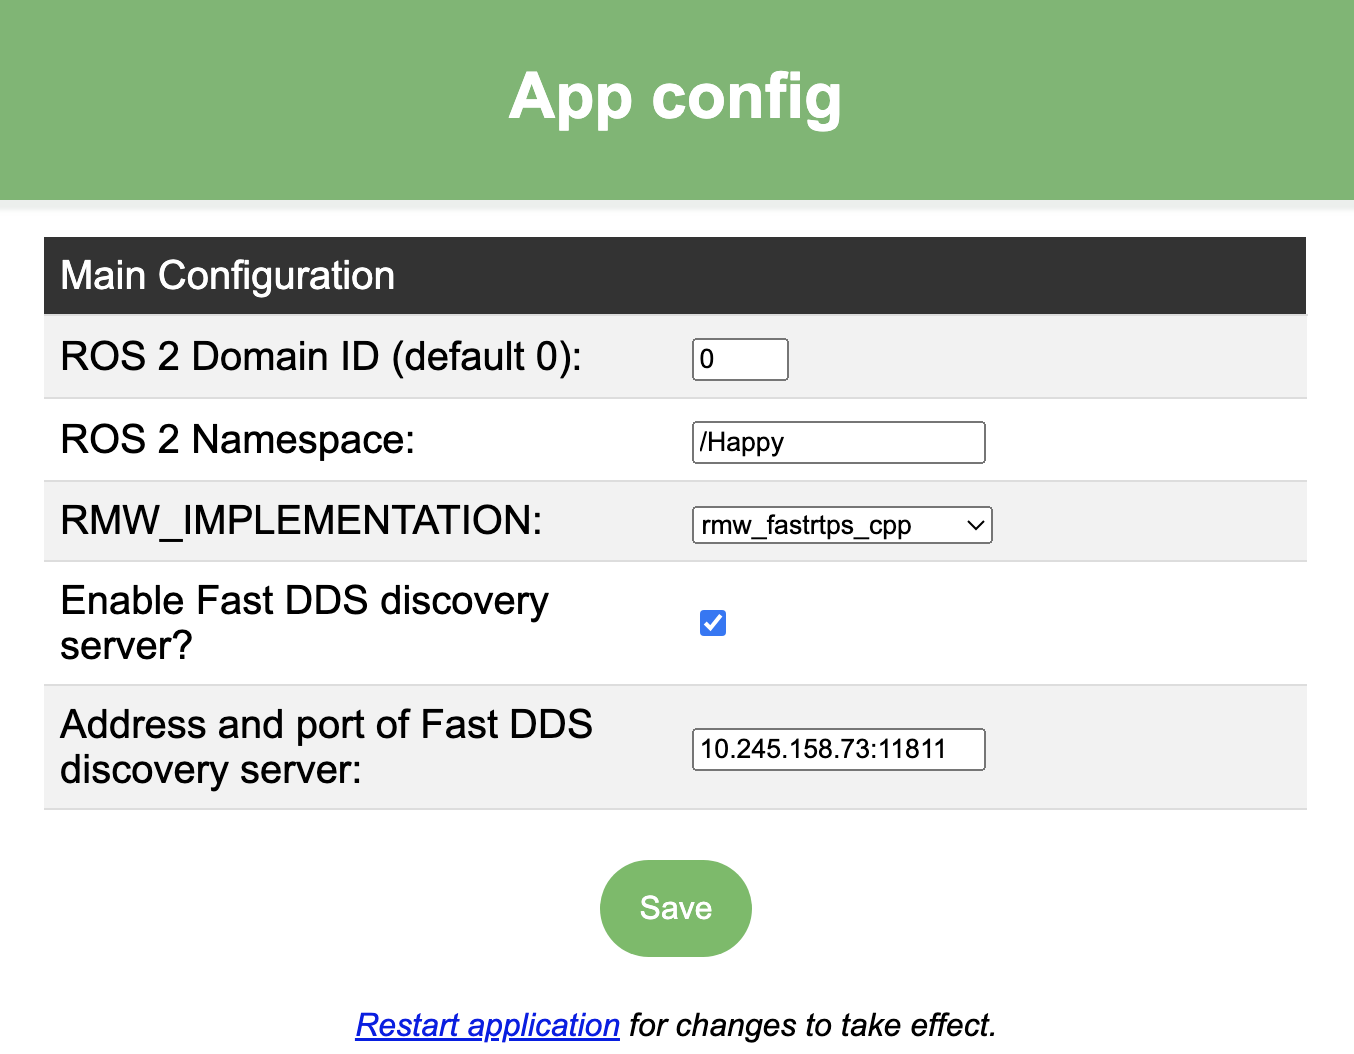
Navigate to the robot’s web server via its IP address. Go to webserver application settings and enable the checkbox for the discovery server. In the field
Address and port of Fast DDS discovery server, enter the IP address of your server followed by:11811(the default port for the Fast DDS discovery server is11811, but it is configurable). -
If you intend on connecting multiple robots to the same discovery server, make sure to give the Create® 3 robot a namespace. Restart the application after saving all settings.
Attention
It is recommended you check the logs to confirm the discovery server has been enabled on the robot. 
Configure Other Devices as Super Clients
When using a discovery server with a Create® 3 Robot, all other devices connected to the discovery server must be set up as super clients in order to communicate with the Create® 3 Robot. Other devices could be any device that runs ROS 2 and wants to communicate with the Create® 3 Robot.
-
Before starting, stop the ROS 2 Daemon with
ros2 daemon stop. -
Download the .xml file found here and replace VM_IP with your device’s IP address.
-
Navigate to your device and open terminal. If the super client and server are on the same computer, make sure to open a new terminal (separate terminal from where the server is running).
-
Assign your .xml file as your default profile by entering the following.
export FASTRTPS_DEFAULT_PROFILES_FILE=/path/to/the/xml/profile -
Now, try looking for the Create® 3 topics list by running
ros2 topic list.